Q101: Binding Your Quilt-The Final Stage
Here we are, we have come to the last and final stage of our quilting adventure together on the world wide blogging community. I am thankful that you have taken the time to join me and I hope that this inspires you to create something beautiful. I never would have imagined that I could create something like this with so little sewing experience, yet I did!
Your quilt is in three layers now. I will talk a little bit about how to get your binding ready. I used a black and white polka dot fabric for my binding.
I took the fabric and cut it into long 2 1/2" strips. By doing this you are essentially piecing together what will ultimately go all along your outside portion of your quilt. Once you have enough to go all the way around your quilt and then about 10 or more inches of extra you have enough to complete the binding. I struggled at times to get the binding around the outside and I think if I could do this particular part over I would cut 2 3/4" strips instead.
Once you strips are cut then you need to sew them together. I read a few blogs about this because I had never done this before and I didn't know what I was doing. I don't have many pictures of this part because I was very focused on how to do it. Essentially you lay one strip facing you horizontally and then another vertically towards the end of the piece. You create a 45 degree angle cut and sew a seam. That is so vague I know I am so sorry that I did not get more pictures of this part. You do that over and over until all of the pieces are sewn together. Once you have one big long piece then you need to iron each individual seam that you just sewed open flat.
The binding will be laid on the top layer of your quilt folded in half. Like this...
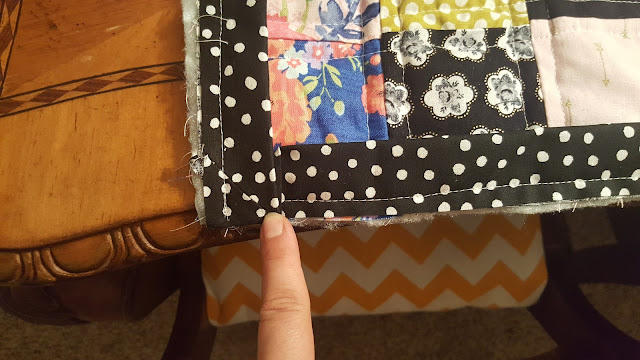
You simply sew around the outside of the quilt with your presser foot lined up with the outside so your stitch is 1/4 of an inch in. Be sure that your seam is going through all three layers and especially through the fabric squares. Now the corners are trickier. I again had never done this and so I read a lot of blogs about this particular step. Hopefully next time I am doing a quilt (Which I dream will be soon) I can further explain this section and do a more in depth blog on each of the binding processes. As a brand new quilter that would have been super helpful for me! It should look something like this...
When you do a corner you sew all the way to the end about 1/4 inch away from the very end of that side of the quilt. Flip the fabric piece up and the down the other side of the quilt. You begin sewing on the other side of the quilt.
In the first picture you can see this like flappy triangle part. That part will just kind of stick up at this point but once you hand sew the binding down on the other side it won't stick out! Here is another close up of a corner completed.
The connecting piece is also tricky. I would suggest just laying the one binding inside the other binding and sewing. Make sure they overlap a few inches and then sew over the opening. There are other suggestions to doing this part. Be sure to google or read about this as you connect you two pieces of binding.
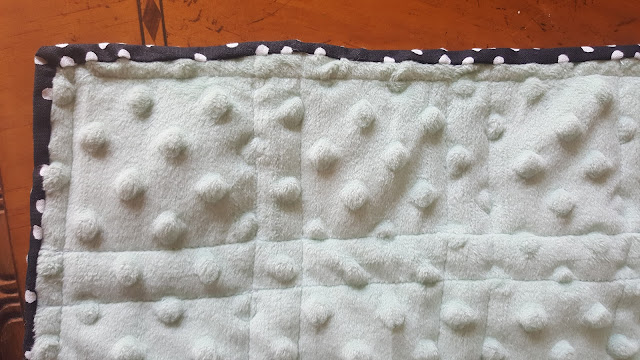
Now that your first side is complete we will move onto the backside of your binding adventure. Be sure you have a sharp needle, a thimble, and thread. You can either sew it down with your machine or do a blind stitch. I chose to do a blind stitch because I didn't want it to be seen. I also had no idea what I was doing and it took a while before I got the hang of this process. Again I don't have many pictures of this process but I will share what I have!
You bend over your binding and pin all the way around the outside of the quilt. This would have been super helpful for me if I had done it. I will definitely be doing that next time. Once you are all pinned get your knot in place and begin to sew. You place your need through the bottom layer of your quilt being sure not to go all the way through to your top layer, bring it back through and then pushing it slightly into the binding you just folded over. Imagine that the binding is a tunnel and you want the needle to go through into the tunnel part. Then push it out of the tunnel a little way down the quilt about 1/4 of an inch. Pull your thread through and you have your first stitch. Now because you put it through the tunnel you should have no visible stitch.
Again:
1. Needle through the mink green mint fabric only.
2. Back up through the mink green mint fabric.
3. Into the polka dot tunnel.
4. Out of the tunnel about 1/4 of inch down the tunnel.
5. Then repeat.
Corners are a little tricky. I simply guessed. I am sure there is a blog out there you can find to help with the corner part and even this part because I don't have good pictures of that process. But I do have the final product! Once you finish your binding you are done!!
Here is baby girl's beautiful homemade quilt!
I would love to chat with you about your quilting adventure or just hear about what you have been creating! Feel free to send me an email or post some comments below! If you have an idea for another blogging topic please let me know!! Happy Quilting!


Comments
Post a Comment